Windows 11 has been out for quite a while, and there's a chance you might have installed it on your PC by now. However, if you're not liking the new operating system for any reason, you can easily uninstall it from your system in more ways than one.
There are certain conditions that might need to be met, though. You can only uninstall Windows 11 within 10 days of installation without losing your files. After that, you'll need to do what is known as a "clean install" of Windows 10 or your previous operating system. We'll touch on both methods in this handy guide.
Still undecided about whether to uninstall or keep Windows 11? Have a look at our guide to Windows 10 versus Windows 11.

Rollback to Windows 10 and keep your files
The easiest way to uninstall Windows 11 is by rolling back to Windows 10. With this method, you will not lose any of your files, but there is a catch. You only have 10 days from when you initially updated to
Step 1: Open the Windows 11 settings menu with Windows key + I.
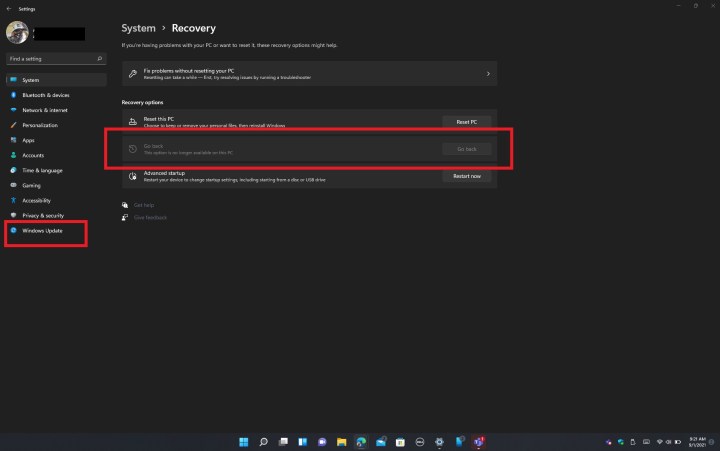
Step 2: On the sidebar, click Windows update.
Step 3: In the middle of your screen, click Advanced options.
Step 4: Click Recovery followed by the Go back button.
Step 5: Plug your laptop into a power outlet, and follow the steps on the screen.
After a few restarts, your PC will be set back to Windows 10 and will no longer be on Windows 11. This is the safest and easiest way to go back to Windows 10 as it keeps everything in place. You will not lose any of your files or documents, but any apps you installed while using

Install Windows 10 via an ISO and delete your files
Another way to uninstall Windows 11 and go back to Windows 10 is by using an ISO file. This is the only way to go back to Windows 10 if you’ve gone beyond the 10-day rollback limit. Under this method, you’ll be losing all of your files and apps and will have to restart from fresh.
Before you proceed, we suggest saving any of your files to external storage. This is so you can get back to it later after you uninstall Windows 11. Once you do that, follow our steps below.
Step 1: Visit Microsoft’s website and download the Windows 10 Media Creation Tool.
Step 2: Once the tool is downloaded, launch it on your Windows 11 system, and agree to Microsoft’s terms of service.
Step 3: Choose the option to create installation media for another PC and click Next, and then Next once more.
Step 4: Choose ISO file and then choose Next.
Step 5: Choose a location to save the file to (the desktop is a good place).
Step 6: Allow Windows 10 to download.
Step 7: Click Finish, and then navigate to where you saved the ISO.
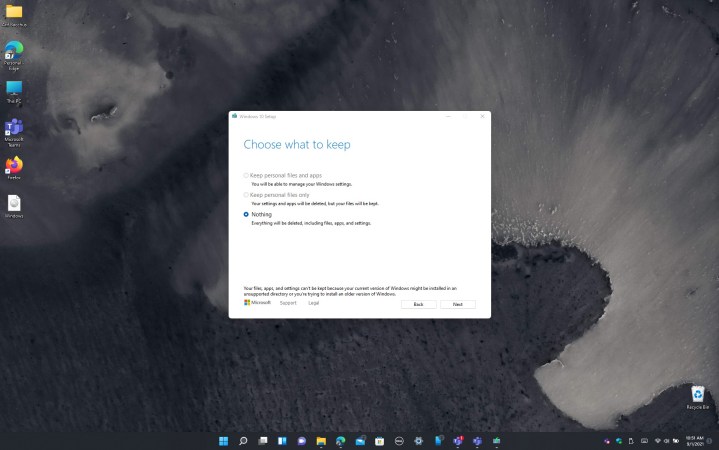
Step 8: Double-click to launch the ISO file. Look for the Setup icon and click it, then follow the instructions on your screen to downgrade back to Windows 10.
Make sure that you test out Windows 11 within 10 days so you can decide if you like it or not. If your 10-day grace period has expired, there is no other way to uninstall
Editors' Recommendations
- How to convert HEIC to JPG on Windows 11
- How to install Windows 11 or Windows 10 on the Steam Deck
- Ranking all 12 versions of Windows, from worst to best
- How to recall an email in Outlook
- How to disable VBS in Windows 11 to improve gaming


